Build guide
Crate
Build the miniature wooden crate in 5 steps, from 6 panels with the letters A to F. The lid lifts open.
What you build
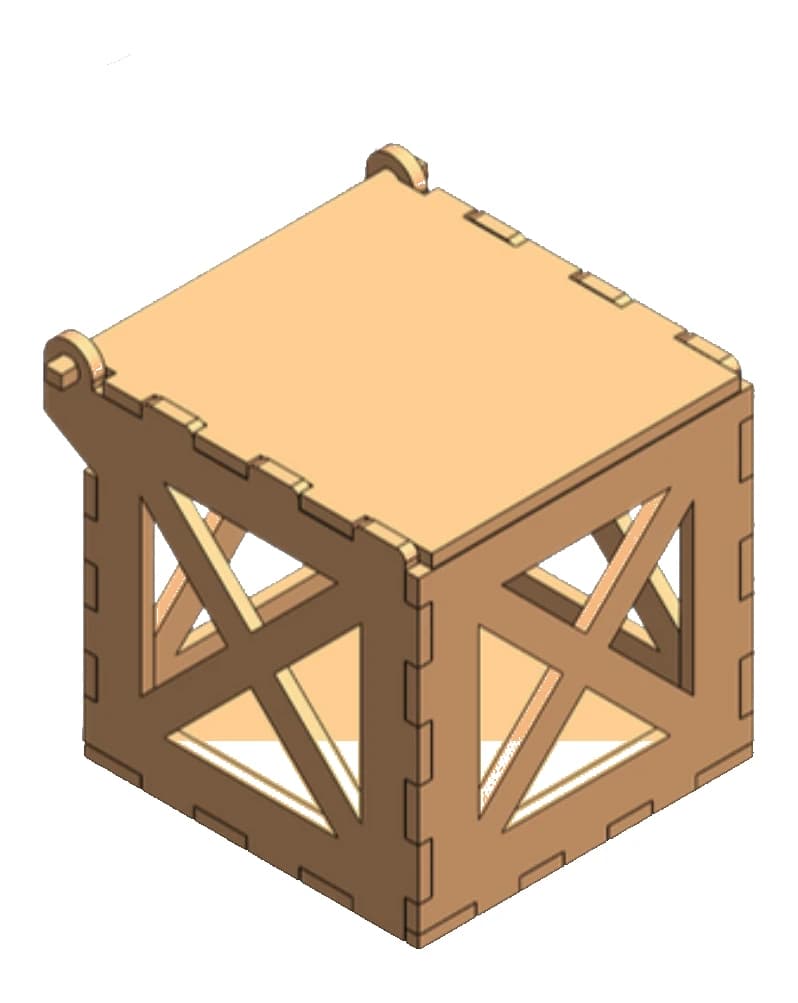
Caution: small parts. Keep them away from young children.
The parts
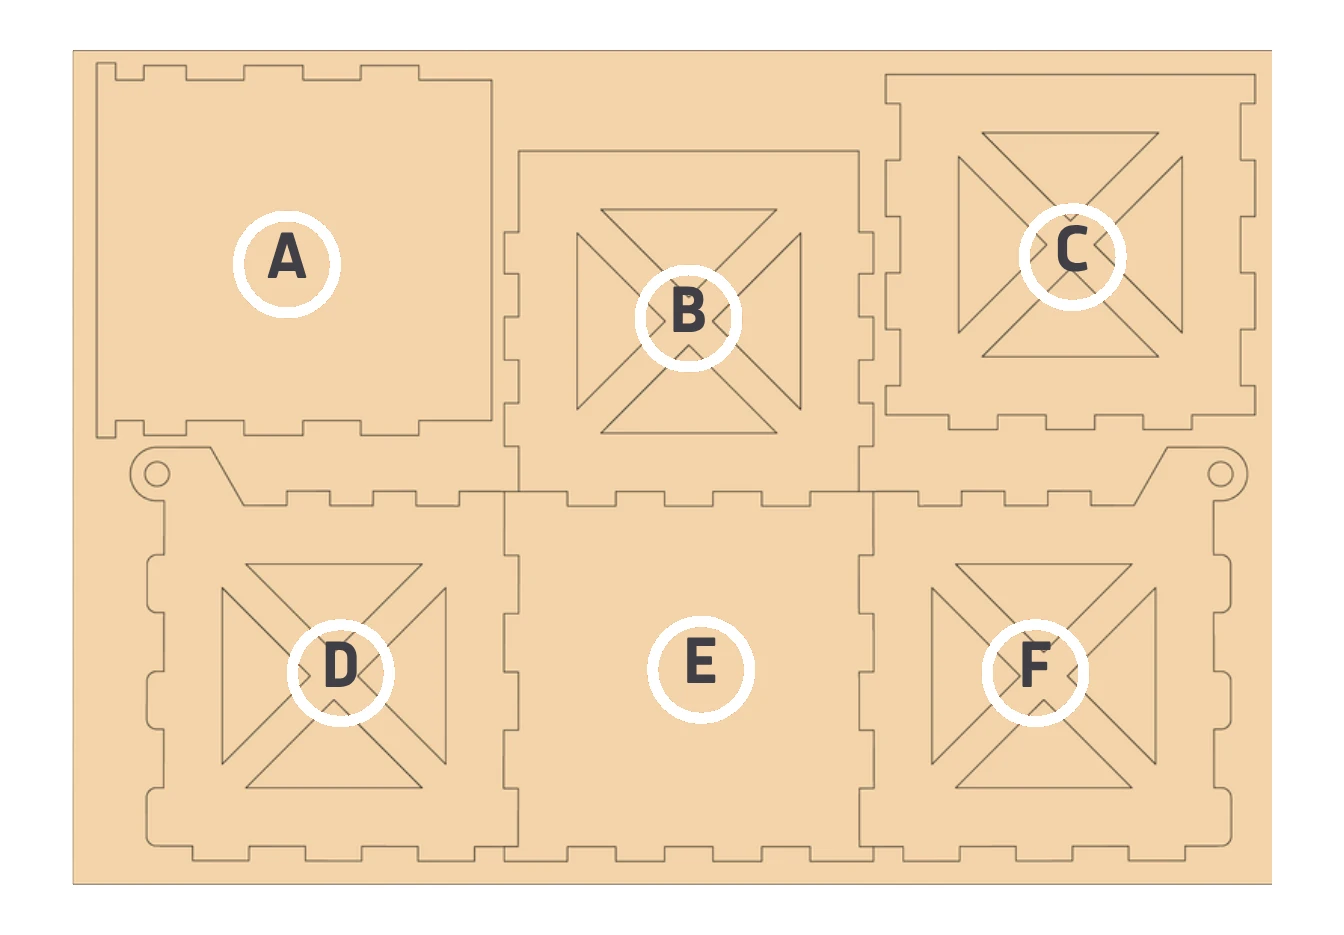
The steps name each panel by its letter.
Before you start
- Press the parts out of their frame.
- Fit the parts together without glue. Rubber bands hold them while you try.
- Take the parts apart. Then glue each joint as you fit it, and press it for a moment.
- Wipe off the extra glue.
Step 1
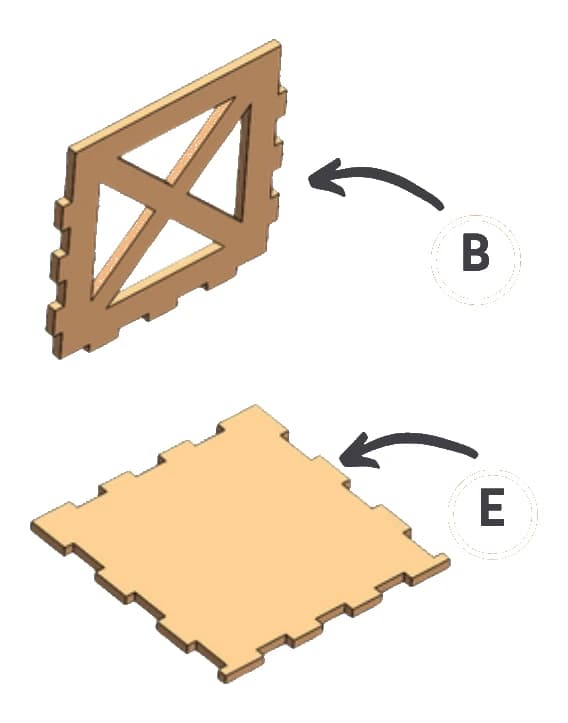
Fit side B onto the base E.
Step 2
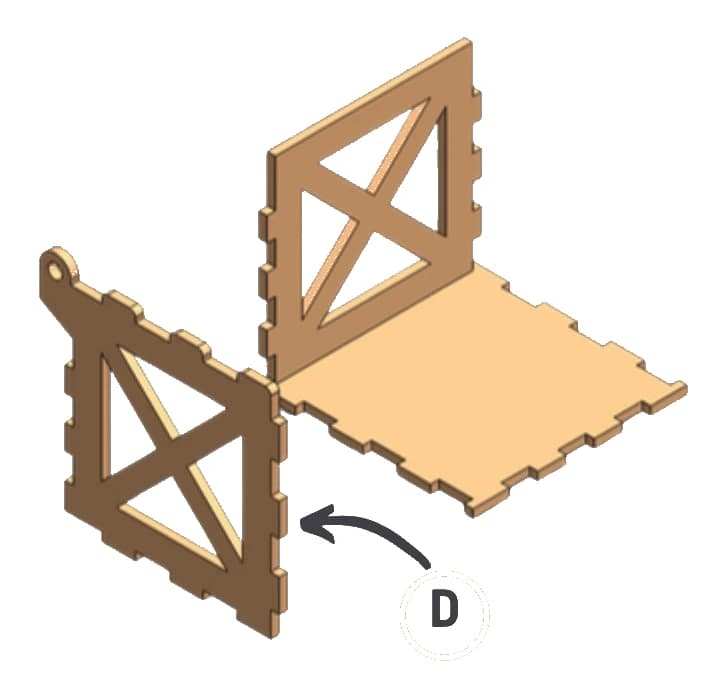
Fit side D onto the base, next to side B.
Step 3
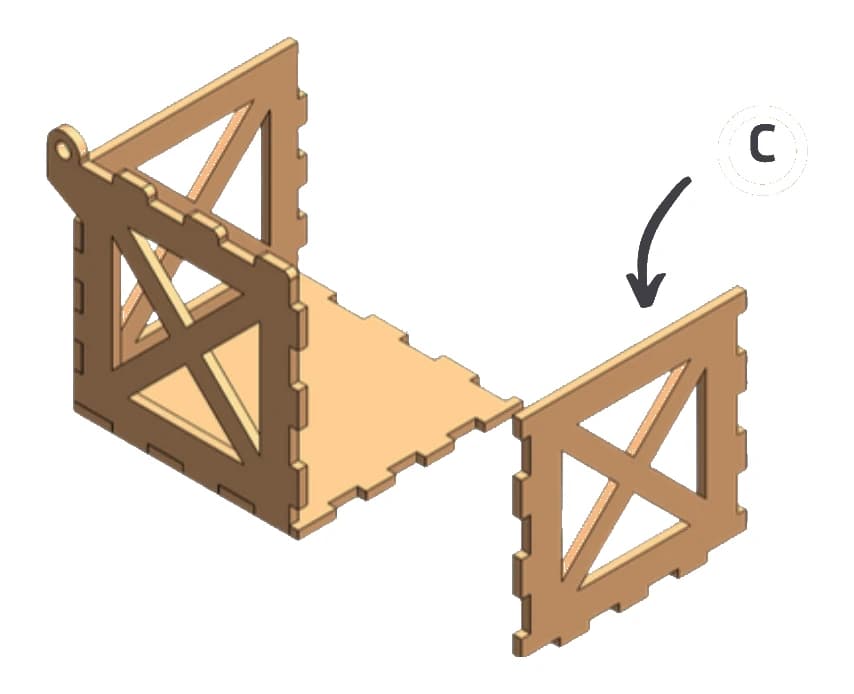
Fit side C onto the base, across from side D.
Step 4
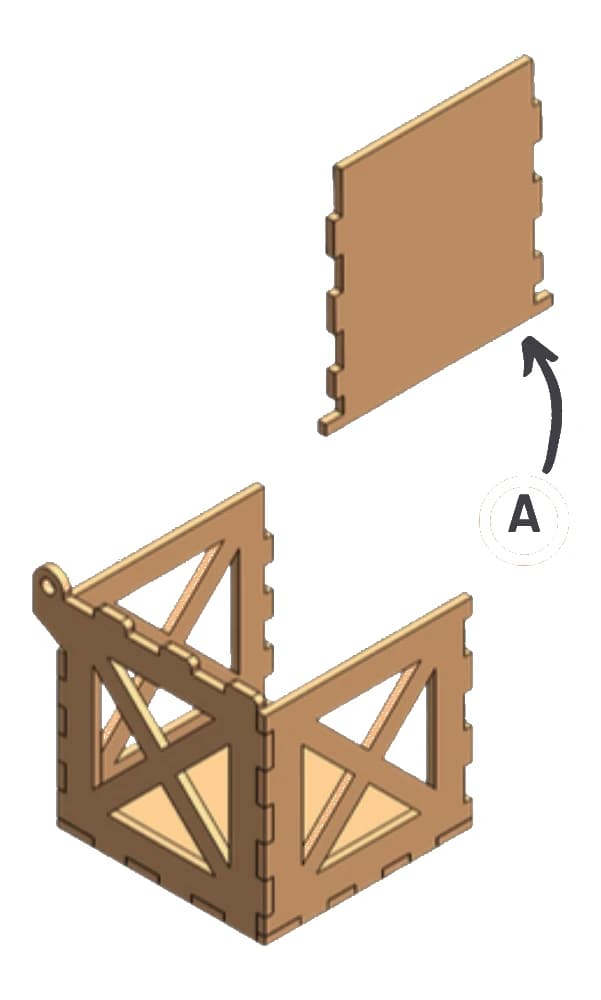
Fit the lid A onto the top of side B.
Step 5
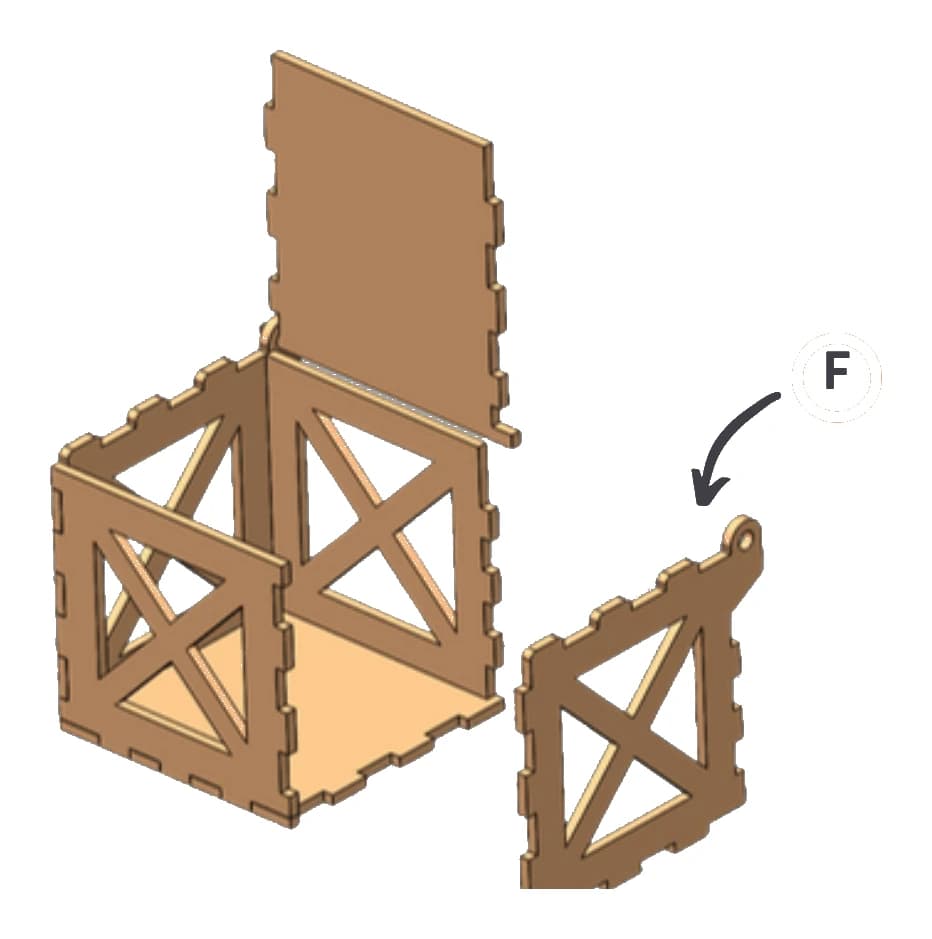
Fit side F to close the crate.
When you finish
- When the glue is dry, paint the part with acrylic paint.